This blog is a continuation of the previous blog where we covered some basics of C++, created a demo pass and prints function names following the LLVM guide. In this second part, we are gonna Leeroy Genkins it and dive straight into writing LLVM passes.

Read More
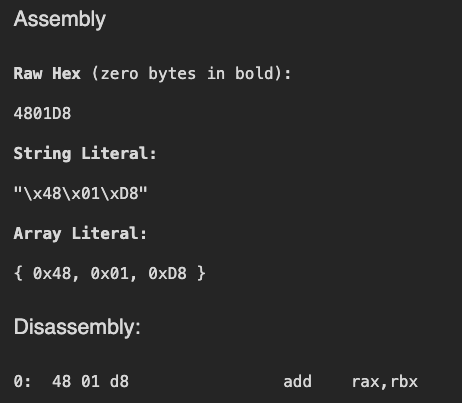
While learning more about x86_64, I went down a rabbit hole recently, and it all started with this:
Read More
This series of blogs is supposed to document my learning journey from a C/gcc nerd to a C++/LLVM chad. Expect this blog to be very informal, with the occasional rant, but it will document everything that I have learnt, including C++ internals, gimmicks, LLVM quirks and other references.

Read More
While preparing for my talk at Insomni Hack and reviewing the sinister-vsix project, I wondered: “Hey, how does VSCode fetch the metadata for these extensions?”. Just a small recap, during the Task#4 - we spoofed a Microsoft Published Extension.
However, upon examining the extension code, I noticed a couple of things:
- Metadata like stars, download count, etc wasnt stored in the source code (which made sense)
- “Where is the blue tick coming from?”
So, I decided to take a deeper look. This blog documents the result of the research done quickly at an airport while I am on my way to present my fully finished 100+ slides deck(boy oh boy do I have to change those!) - but hopefully it’s not tooo incohorent.
Read More
In this blog series, we explore how to obfuscate a Metasploit payload to avoid detection by Antivirus Engines and shall try to go invisible.
We would employ known techniques and see how they affect detection rates uploading the compiled executable to AntiScan as it does not submit the samples to the vendors.
Warning: Antiscan.me is no longer active so some links might be broken
Read More